On the Cutting Edge with the ESP32-S3
It’s been a while since I’ve posted – work and life have been busy! I’ve been dabbling with the new ESP32-S3 DevKitC boards from Espressif – I have the ESP32-S3-DevKitC-1-N8R2 […]

It’s been a while since I’ve posted – work and life have been busy! I’ve been dabbling with the new ESP32-S3 DevKitC boards from Espressif – I have the ESP32-S3-DevKitC-1-N8R2 […]
Update: The replacement card has also disappeared from the PCI bus, both in Windows and when booted into Linux. So much for Inateck / Fresco Logic. I’m extremely disappointed. In […]

For my next trick, I’ll be learning the intricacies of running a FlipDot (aka flip-disc) display made by ANNAX: The image above is from the FlipDotBlog site that the ebay […]
My day job has been keeping me busy, and I haven’t had a lot of spare time to work on projects or to even read (I’ve got quite the backlog […]
From what I’ve gathered (e.g., from the forums as well as the complete lack of information since May) it seems the Arduino STAR Otto is no more.

“An ESP8266? That’s easy! Feel free to follow along with my simple step by step instructions. I make codeloading FUN!!” (with apologies to Strong Bad) Beware: There be dragons here! While […]

[Updates at the end of this article] At today’s Bay Area Maker Faire I was hopeful that I’d hear some news on the Arduino Star OTTO… I walked away with not […]

In the course of my investigation of LEDs claiming to be WS2812Bs, I created a review on Amazon for Mokungit’s 93 LED ring device – because unlike other devices from […]

I got a WDF_VIOLATION BSOD (0x0000010D) in Windows 7 (x64) when I connected a dev board via USB serial today. It was an alarming error I’ve never seen before… … […]
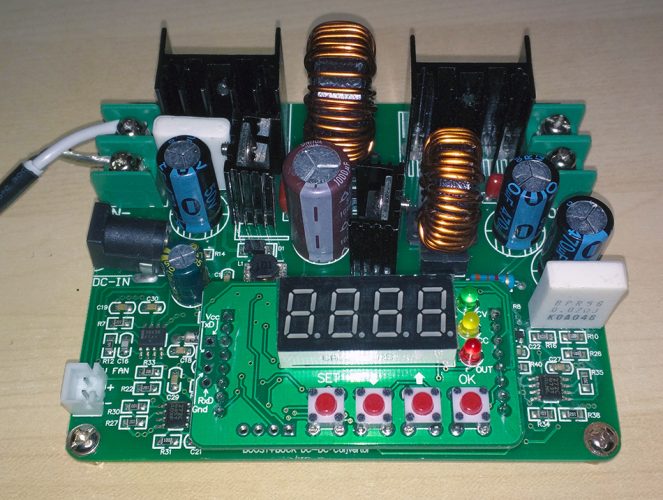
The following information seems to generalize to any of MingHe’s buck/boost converter designs with the 8x2pin daughter board with display and buttons). There’s a good writeup about this device submitted by a […]
I’ve added a gist with the details of how to build Python (3.4, 3.5, and even 2.7) on a Raspberry Pi 2 (it may also work on a regular old Pi […]
I’ve added a gist with the details of how to build Go 1.5.x+ on a Raspberry Pi 2 (it may work on a regular old Pi but I haven’t tested that). […]
The Raspberry Pi is a fun if limited little single-board computer (were that it had more than one core). That said, running off an SD card is not exactly optimal, with write speeds […]
As I learn about the Go programming language I thought I’d share some of what I’ve learned as an occasional series. My current Go exploration is prime number identification and the […]